Lab 8
The purpose of this lab is to have the RC car perform a stunt. I chose to do a drift, which involves driving the car as fast as possible towards a wall then conducting a 180 degree turn and driving away from the wall.
Orientation Control (Drifting)
Drifting consists of three primary components: Driving straight at the wall, rotating 180 degrees, and then driving away from the wall. From Lab 7, I developed a case to enable the RC car to drive straight towards a wall. I repurposed this case to enable flags to allow the RC car to drive straight towards and away from the wall for this lab. The second component, turning 180 degrees, can be solved using the orientation PID control, which was developed in Lab 6.
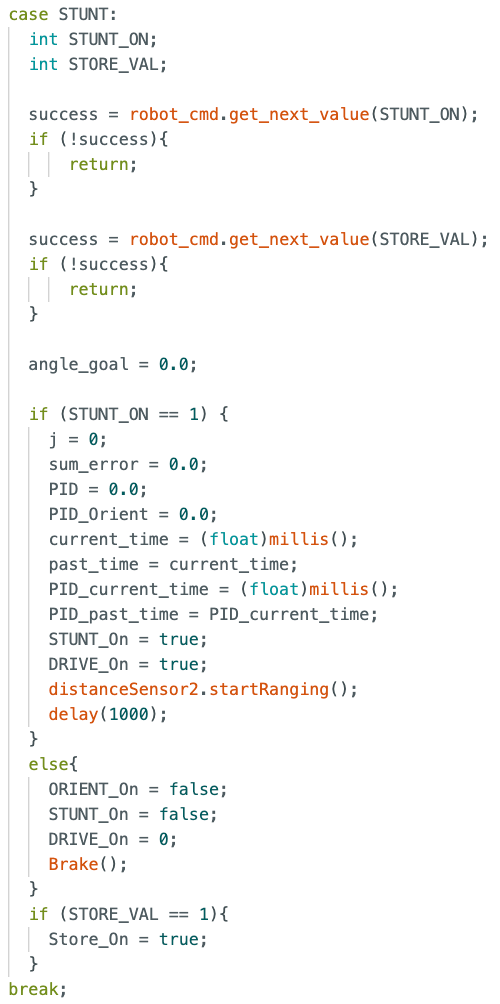
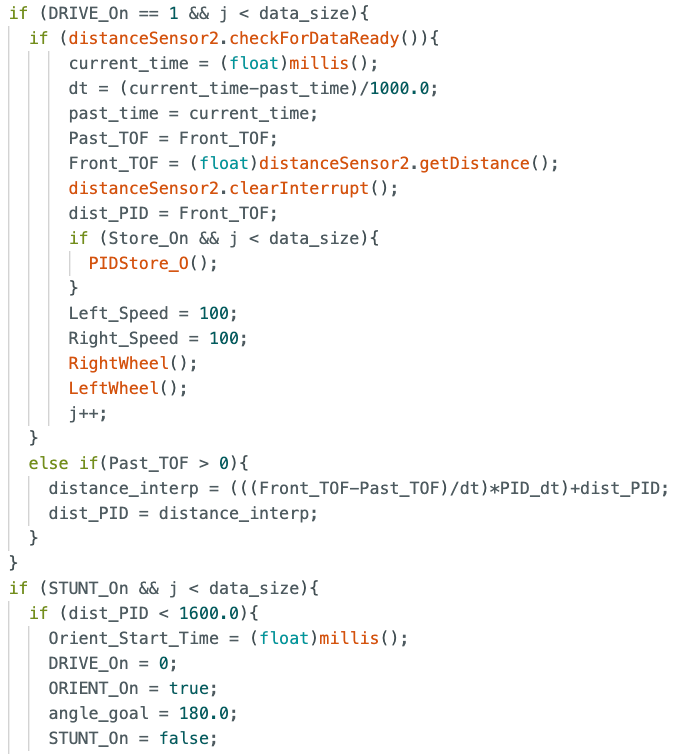
In order to conduct the full stunt, I had to use flags to turn the orientation PID control on and off. I first drove the RC car full speed towards a wall. Using the TOF sensor, I could detect when the RC car was within 1600 mm. At this point, I turned off the drive case and enabled the orientation PID case. This distance threshold allowed the car to turn around and drift without hitting the wall. Then, after a set amount of time orienting at 180 degrees, I disabled the orientation case and re-enabled the drive case. The car then drives away from the wall until stopping a second later. The case and code in the main while loop are both shown below.


Drifting Results
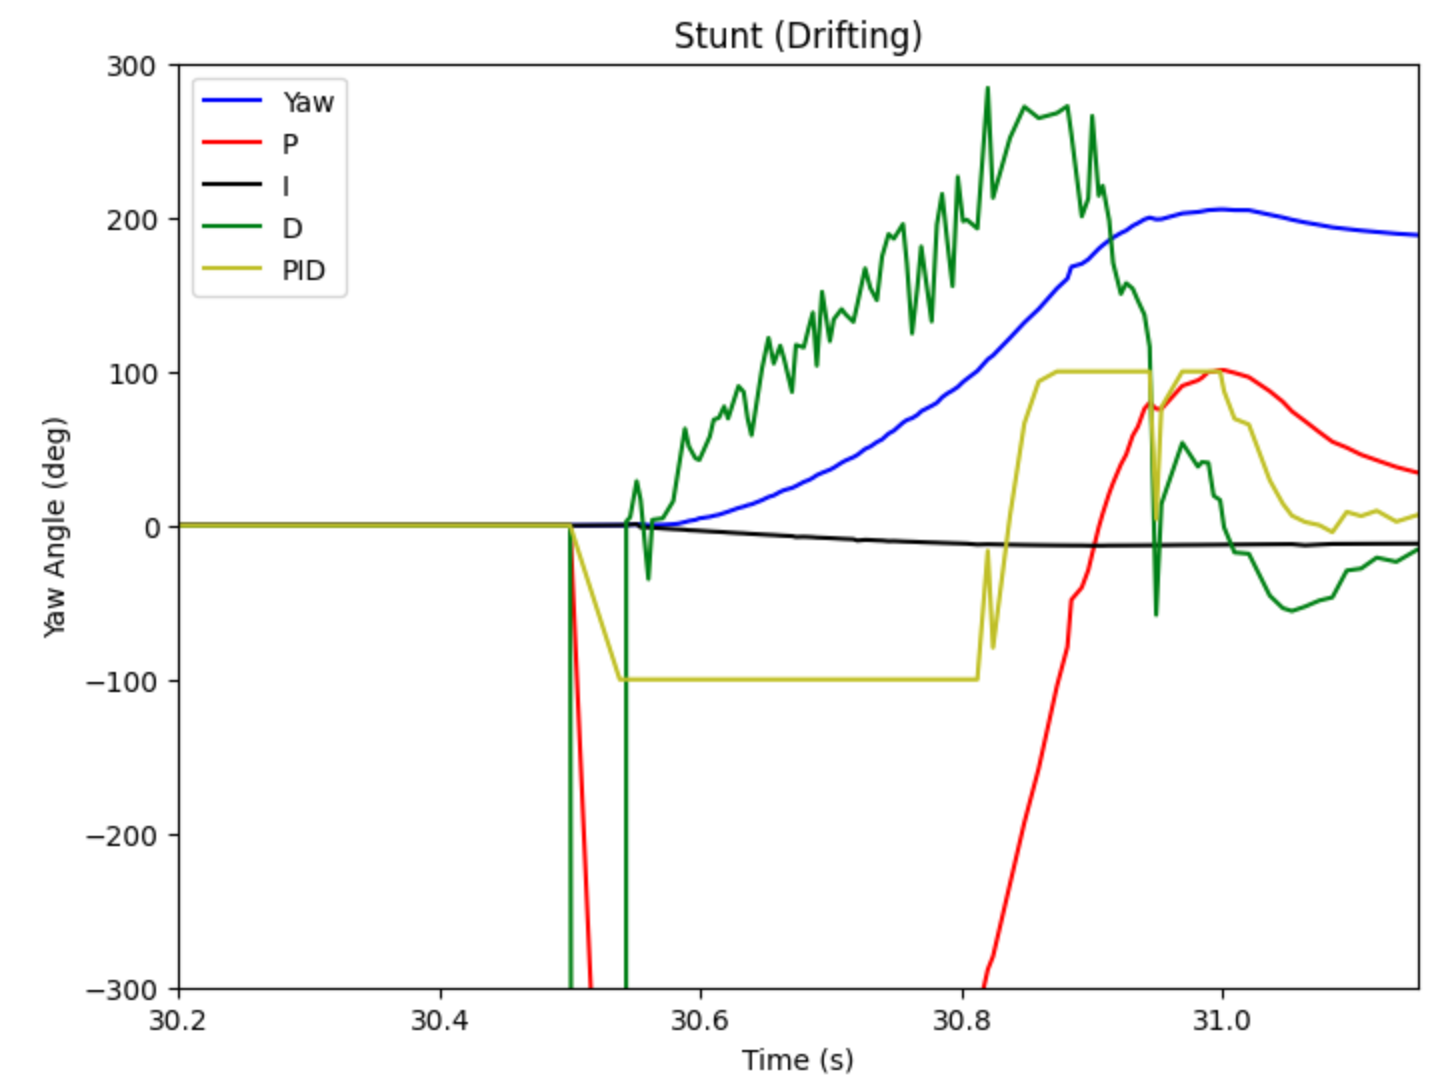
A successful trial of the car drifting is shown below. The graph alongside it shows the orientation (yaw) in degrees as well as the PID with respect to time. The PID values correctly align to what I expect to happen during the stunt.

Lab 8 Takeaways
This was the first lab where we were able to utilize the building blocks developed in previous labs to conduct a full task. This provided a very good practice task of using a mix of linear and orientation motions. I look forward to exploring more advanced maneuvers using these techniques.